
Render Realism · Render Upgrade
Make your render
look real.
A flat render, a draft, an untextured pass — or one that is technically finished and still reads as CGI. It comes back photorealistic, on the geometry and camera you already set.
4 credits included · 2 credits a render · no credit card
The same room, finished
Same walls, same window, same camera. What changed is the light, the materials and the way surfaces respond to them.
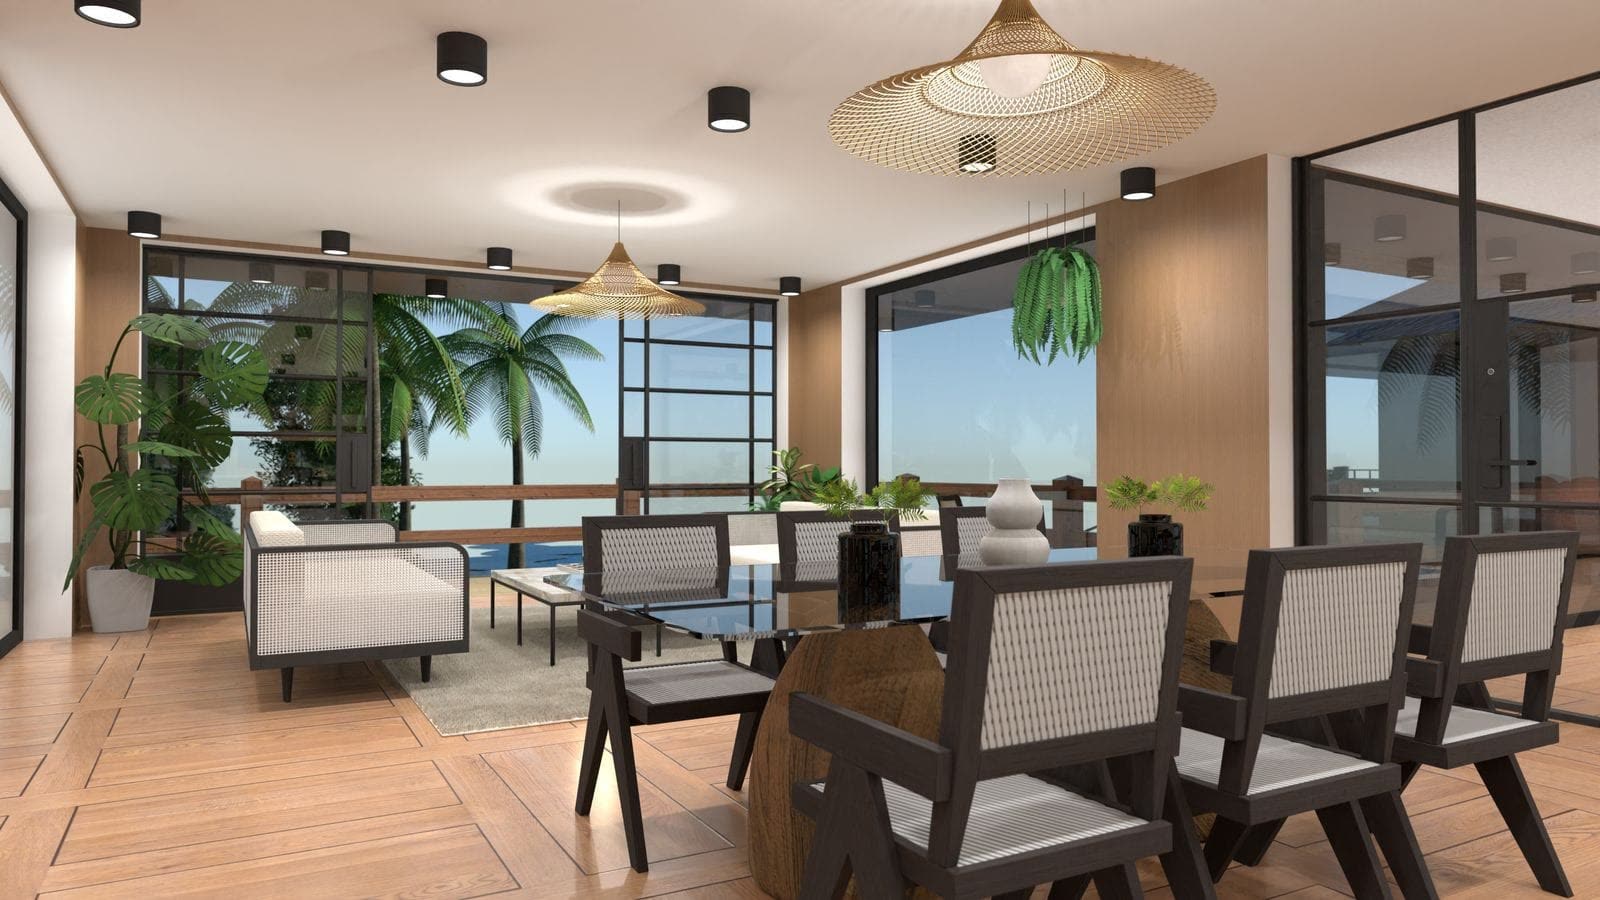
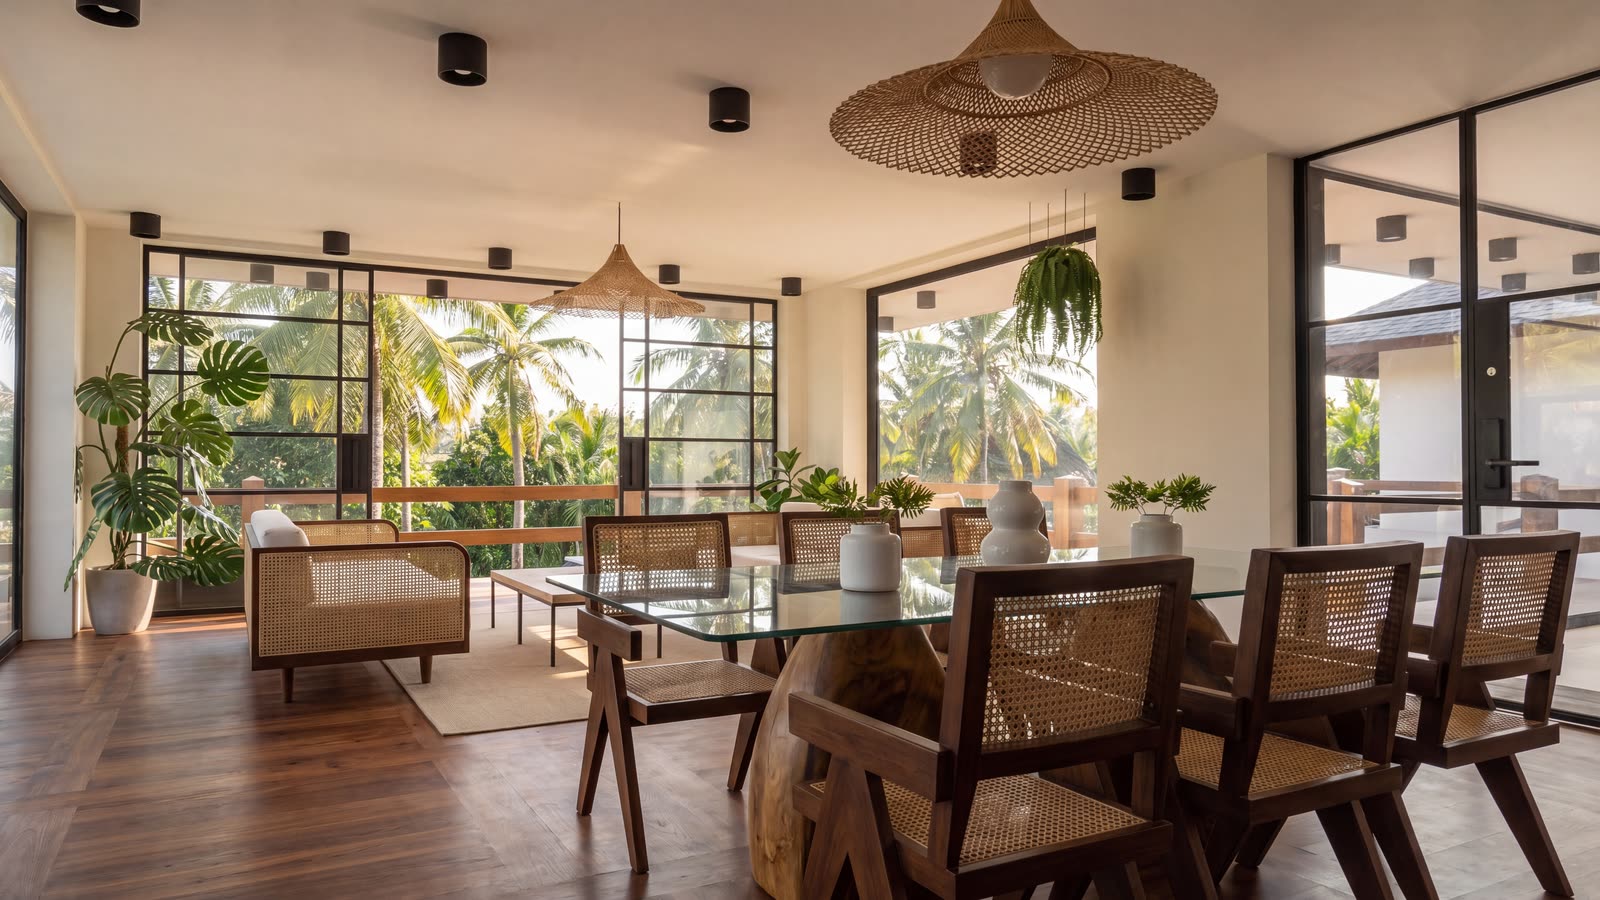
Generic image AI redraws the room and you lose the plan you modelled. Here the geometry, the camera angle and the layout are the fixed part — realism is the only variable.
How it works
No plugin, no render engine, nothing to install.
Export an image from whatever you use
3ds Max, SketchUp, Blender, Revit, Rhino, Lumion — it does not matter. A viewport grab or a saved render, at whatever resolution you have.
Upload it
You upload an image, not a scene file. Nothing about your model leaves your machine and there is no version or plugin to match.
Get the finished frame back
About 75 seconds, measured on real jobs. If you need it bigger afterwards, upscaling is a separate step.
Who reaches for this
Architecture and design students
A deadline tomorrow and no access to a render farm. The model is done; what is missing is the hour of GPU time nobody has.
3D artists mid-project
A client wants to see the direction before you commit to a full render pass. This gives them something to react to in a minute and a half.
Interior designers and decorators
You have a layout in a modelling tool but you are not a rendering specialist, and the flat output undersells the room.
Anyone with an old render
A project from two years ago that still looks like 2019. The file is all you need — no re-opening the scene.
Realistic is not the same as bigger
Two different problems that get confused constantly, and doing them in the wrong order wastes a step.
Make it realistic — this page
Changes how the image looks: light, materials, finish. The resolution stays what it was. 2 credits.
Make it bigger — the upscaler
Changes only how large the file is, up to 8K, without restyling anything. See the AI render upscaler. 1 to 4 credits.
For print, do both
Realism first, then upscale. Doing it the other way round means enlarging an image you were going to change anyway.
Questions
Will it change the layout I modelled?
No. The geometry, the camera angle and the layout stay as you built them. What changes is the lighting, the materials and the finish.
Which 3D software does it work with?
Any of them. You upload an image rather than a scene file, so output from 3ds Max, SketchUp, Blender, Revit, Rhino, Lumion or anything else works the same way.
Do I need a plugin or a render engine?
No. There is nothing to install and no version to match. It runs in the browser and takes the image you already have.
Does it work on a clay or untextured pass?
Yes. A clay pass, a quick draft, an untextured viewport grab, or a finished render that still looks flat — all of them are valid starting points.
How long does it take?
About 75 seconds, measured on real jobs.
Can I try it without paying?
Yes. A free account includes 4 credits and requires no credit card. Each render costs 2 credits, so two are included before you decide anything.
Upload a render and see it turn real
Free account, no card. Two renders finished before you decide anything.
Upgrade a render free4 credits included · 2 credits a render · no credit card